My Hair Styling Essentials for the Littles: Braids
July 21, 2022

A question I receive constantly when my kids’ hair is braided is, “how did you learn to do that?!” followed by, “what products did you use?” Here are the answers to all things kids’ hair in one place.
Firstly, I am the furthest possible thing from an expert when it comes to technique (though everyone who saw Keogena was finally surprised that it was me who braided her hair which means we’re gettin’ there, y’all) so I’m not going to tell you how to braid. The products, on the other hand, have been researched and researched again so these are things I have 100% confidence in. After much trial and error and watching the experts to compare notes- these are the must-have products for braiding.
If you’re like me, your children won’t have the same hair textures. Oshiolema’s hair texture is much closer to mine, whereas Keogena’s hair texture is almost identical to Oshiomogho’s. It’s Nigerian through and through which means she has about five heads of hair on her scalp. It’s coarse, it’s dense and low porosity. Even though the process is a little different with her hair needing more moisture and masks and Oshiolema’s requiring much less time, the products are the same.
Just to give a frame of reference for the products listed below, I use a clarifying wash and scalp scrub on the kids the night before I put their hair in a protective style to make sure their hair is squeaky clean and ready for moisture. Because Keogena’s hair usually has some form of gel in it, whether to lay her edges or control her curls, getting rid of build up is super important. From the clarifying wash, we move to a deep conditioner with a heat cap for at least twenty-five minutes. After we rinse, It’s time to add her usual products, some heat protectant and get to our blow dry. Stretching the hair is incredibly important if your child experiences shrinkage as severely as my daughter does. This is a crucial step. After the blowout is complete, I split it into four twists and put her silk sleep cap on so she can crawl into bed. She needs her rest- braids begin bright and early the next day.
I can get away with doing the wash, blow-dry and braids for Oshiolema all in the same day. For Keogena, it’s an absolute no, m’aam.
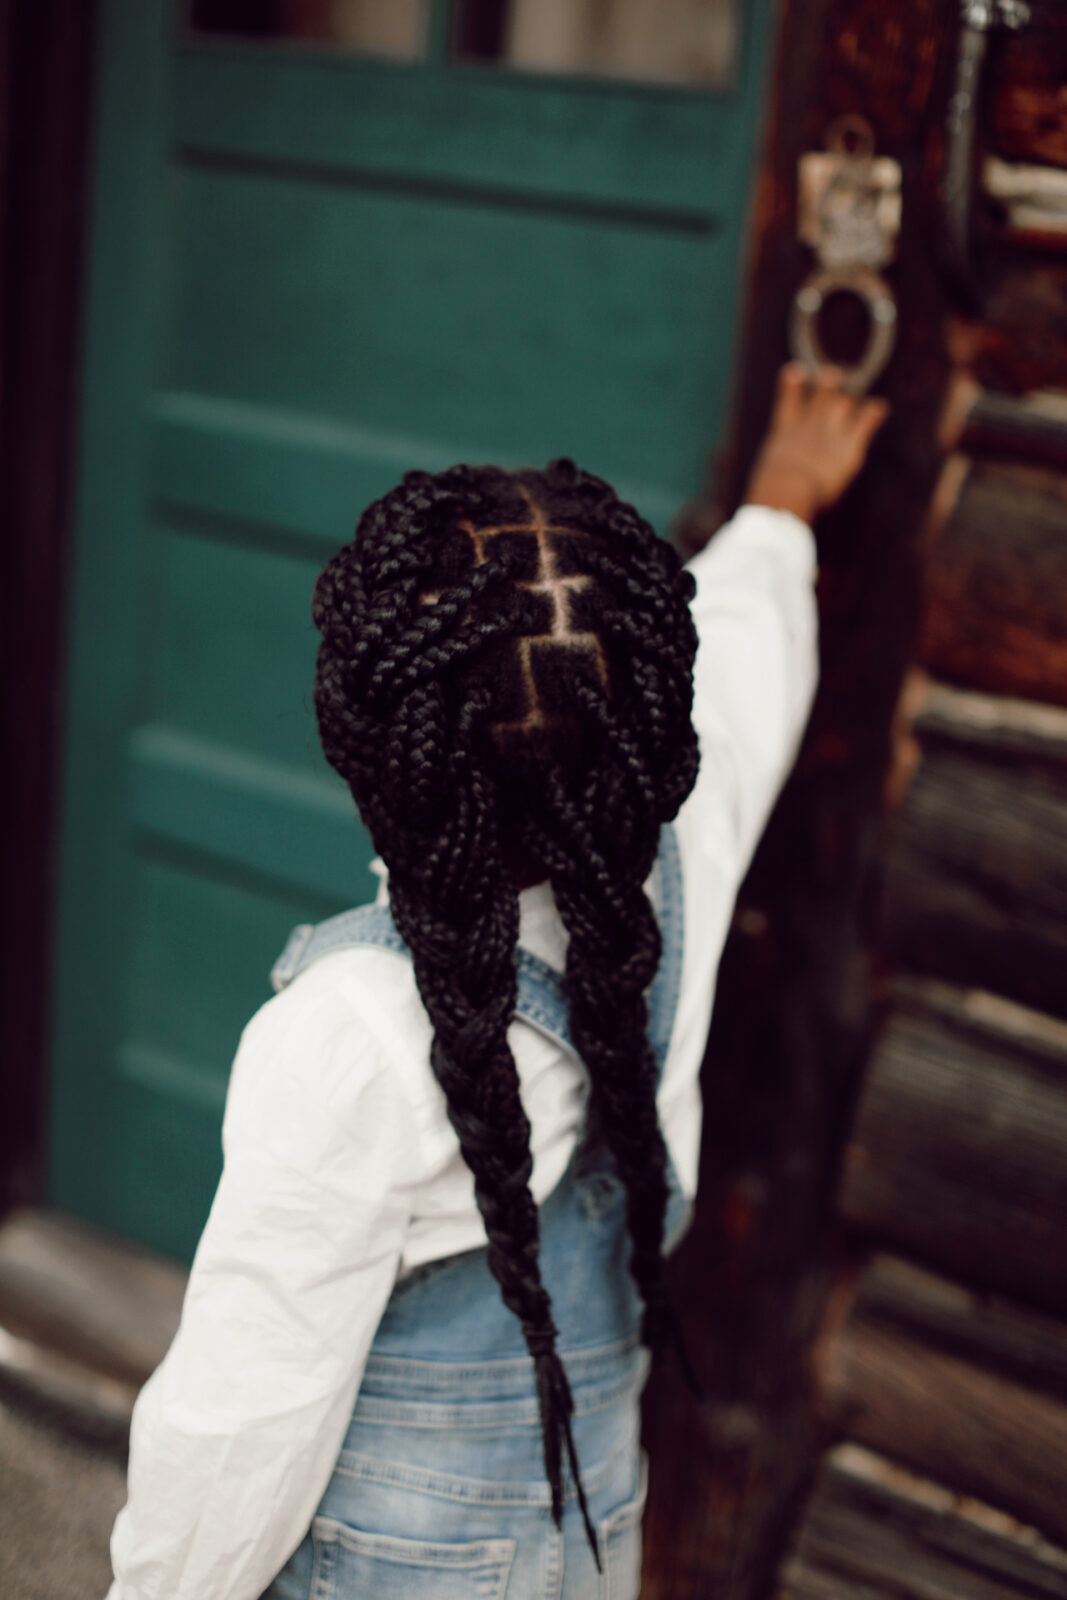
The following morning, I separate the braiding hair into sections and set up each portion on the thread stand. Next, I start parting, being sure to make the parts perfect with the gel and clipping off section by section. If we’re doing knotless box-braids, this is a 7 or so hour process. Once the braids are finished, I trim the flyaways, dip it in boiling water to seal, put on the braiding mousse and wrap it with the styling strips. Then and only then is the process complete.

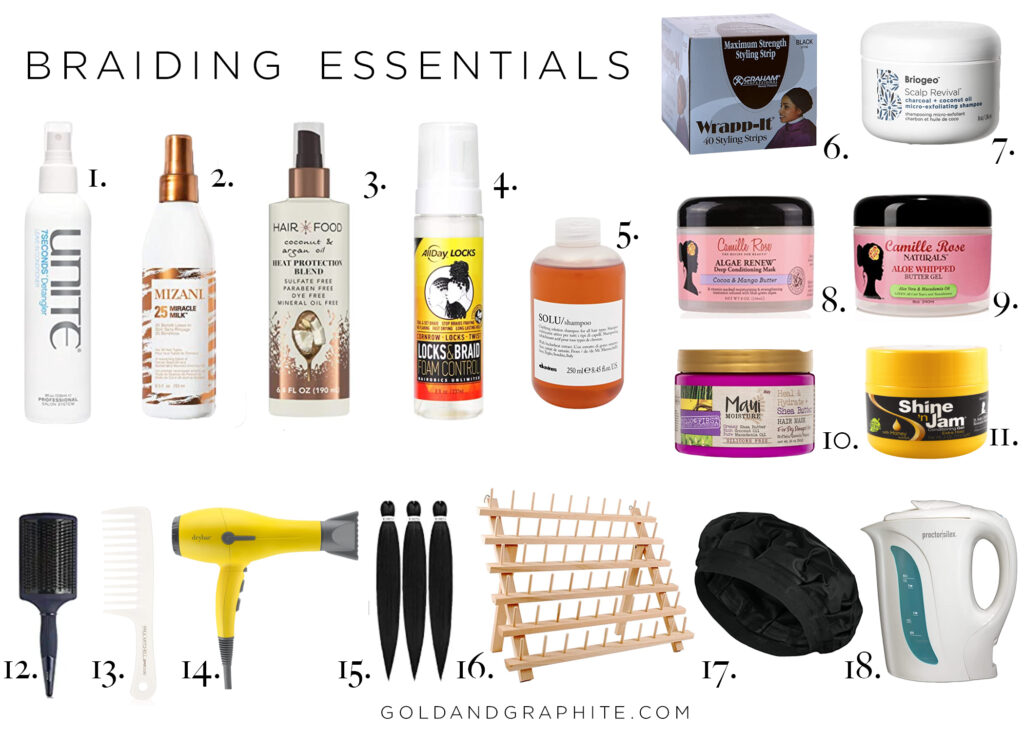
1. Detangler. I cannot do hair without this spray. I use it on my own hair every single time I wash it. I rave about it in this post.
2. Miracle Milk. This adds the moisture their hair needs before going into a protective style.
3. Heat Protectant. DO. NOT. APPLY. HEAT. WITHOUT. THIS. You absolutely must protect their hair shaft and this thermal protectant is fantastic on coarse hair.
4. Braid Mousse. This is the crucial last step that your braids just won’t quite look complete and professional without.
5. Clarifying Wash. I’m not loyal to any single clarifying wash, but I do love this brand.
6. Styling Wraps. If you’re no stranger to the salon or the barber shop, these will come as no surprise. If you’ve never seen them, these strips will secure the shape and edges of your style to make it start strong and last.
7. Scalp Revival. This charcoal scrub is one of my favorite hair products I’ve ever used. It’s one I repurchase the moment I run out year after year because nothing works magic on a scalp quite like it.
8. Deep Conditioning Mask. Truly, any mask will do but I love the ingredients and results we get with this one so it’s our go-to in this house.
9. Aloe Whipped Butter. I love the way this hydrates and preps her hair to be blow-dried and put in a protective style.
10. Hair Mask. I had to include this one too because it’s fire.
11. Shine ‘n Jam. You need at least two tubs of this. Keep a giant chunk on the back of your hands to use throughout each braid and part. When the chunk gets low, reapply. Sorry for using the word chunk twice but there was truly no way around it, you know? You’ll be shocked at how much of this you’ll use so trust me. Buy two.
12. Thermal Paddle Brush. I love blow-drying with this brush. It’s a must.
13. Wide Tooth Comb. Again, any comb will do
14. Blow Dryer. This has been my go-to blow dryer for a solid 5 years and it stretches hair so well.
15. Pre-Stretched Hair. This is the best hair to grab cheaply on Amazon and every professional stylist recommends it so it has been my go-to since 2020.
16. Thread Stand. This is where you’ll setup your hair. You’ll start placing even sections on the bottom row and go row by row with the same size sections until it’s completely full. This will keep the braids consistent and keep the hair from getting tangled.
17. Heat Cap. We love this microwavable heat cap. After applying deep conditioner or a mask, I put a cheap plastic shower cap on and then put this on top to heat the hair and seal in all the moisture. When I was a kid, we had to sit next to the wall with the cap plugged into an outlet so my kids don’t know just how good they have it being able to roam free!
18. Instant Water Kettle. This makes sealing the ends of the braids super easy. I use a deep pot myself but it’s so dangerous I couldn’t possibly recommend it in good conscience and this is the method and kettle all my favorite braiding YouTubers use.
Speaking of my favorite braiding YouTubers, there are just some things you have to become a student of when it comes to parenthood. I have learned more about Black hair care and styling than I ever thought possible since becoming a mother because for the time being, their hair is my responsibility. I want them to feel confident. I want it to be clean. I want it to be healthy. I want it to look great. This is part of my job description and as a half Black, half white woman who had the babies of a 100% Nigerian man- the job is w.o.r.k.
And the reward is great.
Videos that I must have watched a thousand times and use to practice: Everything You Need to Know About Knotless Box Braids, Beginner Friendly Knotless Box Braids Tutorial, How to Get the Perfect Medium Knotless Box Braids in Four Hours, How to Get Your Knotless Box Braids the Same Size- Detailed & Beginner Friendly
Products I use every time but aren’t pictured: this rat tail comb (you’ll want the three pack,) these crocodile clips, this edge comb.
Oh my! I do appreciate the braiding tips and adding this stuff to my shopping cart but I must share that all Nigerian hair is not alike. It is fair to say Keogena has her Dad’s hair, however as a Nigerian and a mother of Nigerian girls, our hair varies greatly! One of my girls hair is finer in texture, looser curls and basically tangle free, while the other is as thick as a forest and a lot harder to navigate. I fall in between those two textures (even looser curls at the nape of my neck) and have sisters, a mother and cousins with a variety of textures – no white people in our family. Just to share a perspective in case you/your readers are not aware.
Hi there! Absolutely. There is a spectrum from one end to the other in every single ethnicity and when we were last in Nigeria, I got to see the beautiful spectrum firsthand. My husband’s family (and entire village) has incredibly dense hair and that’s what I’m referencing here. Thanks, Deke!
This was such an interesting post to read – I loved learning more about a new-to-me topic! What a labor of love for your littles, Jill!